
Waffle Strategy | Solve the Corners First
Quick answer: The waffle corners first strategy means reading and fixing the four corner tiles before you touch the middle of the board. Each corner tile belongs to two words at once, one across and one down, so a correct corner gives you two facts for the price of one move. Start every puzzle by reading the corners, then the two middle-row edge tiles, then the rest. It is the single most quoted tip in Waffle strategy guides, and it works on the standard board, in Unlimited mode, and in Deluxe.
Most players open a Waffle board the same way: they look at the middle, find a yellow letter they recognise, and start swapping. That feels productive, and sometimes it is. But the middle of the board is the least informative place to start. The letters there belong to one word each, so every fact you learn there helps exactly one word. The corners work twice as hard. A corner tile sits where a row word and a column word cross, so fixing one corner tells you something about two words at the same time. Players who solve the corners first finish with swaps to spare. Players who start in the middle often run out of swaps with one word still unsolved, and they cannot work out why.
This guide explains the rule properly. You will learn why corners matter, how to read the whole board in thirty seconds, and how to work a full board from the corners inward, swap by swap. The worked example uses a teaching board built for this guide, with words chosen to show every part of the method. It is clearly labelled as a teaching example, not a daily puzzle, because this site has no shared daily puzzle: every board here is generated fresh for each player, so there is no single set of daily answers to look up. You will also learn what to do when a corner is already green, what to do when a corner is grey, how the centre tile fits in, the mistakes that waste the most swaps, and how the same rule works on the bigger Deluxe board.
If you are new to the game, read our beginner’s guide to Waffle first. It covers the rules, the swap limit, and the colour system in full. If you already know the colours and want a refresher on what green, yellow, and grey mean, our guide to what the colours mean in Waffle has board examples for each one. This guide assumes you know the basics and want to get better.
Why Corners Matter: One Tile, Two Words
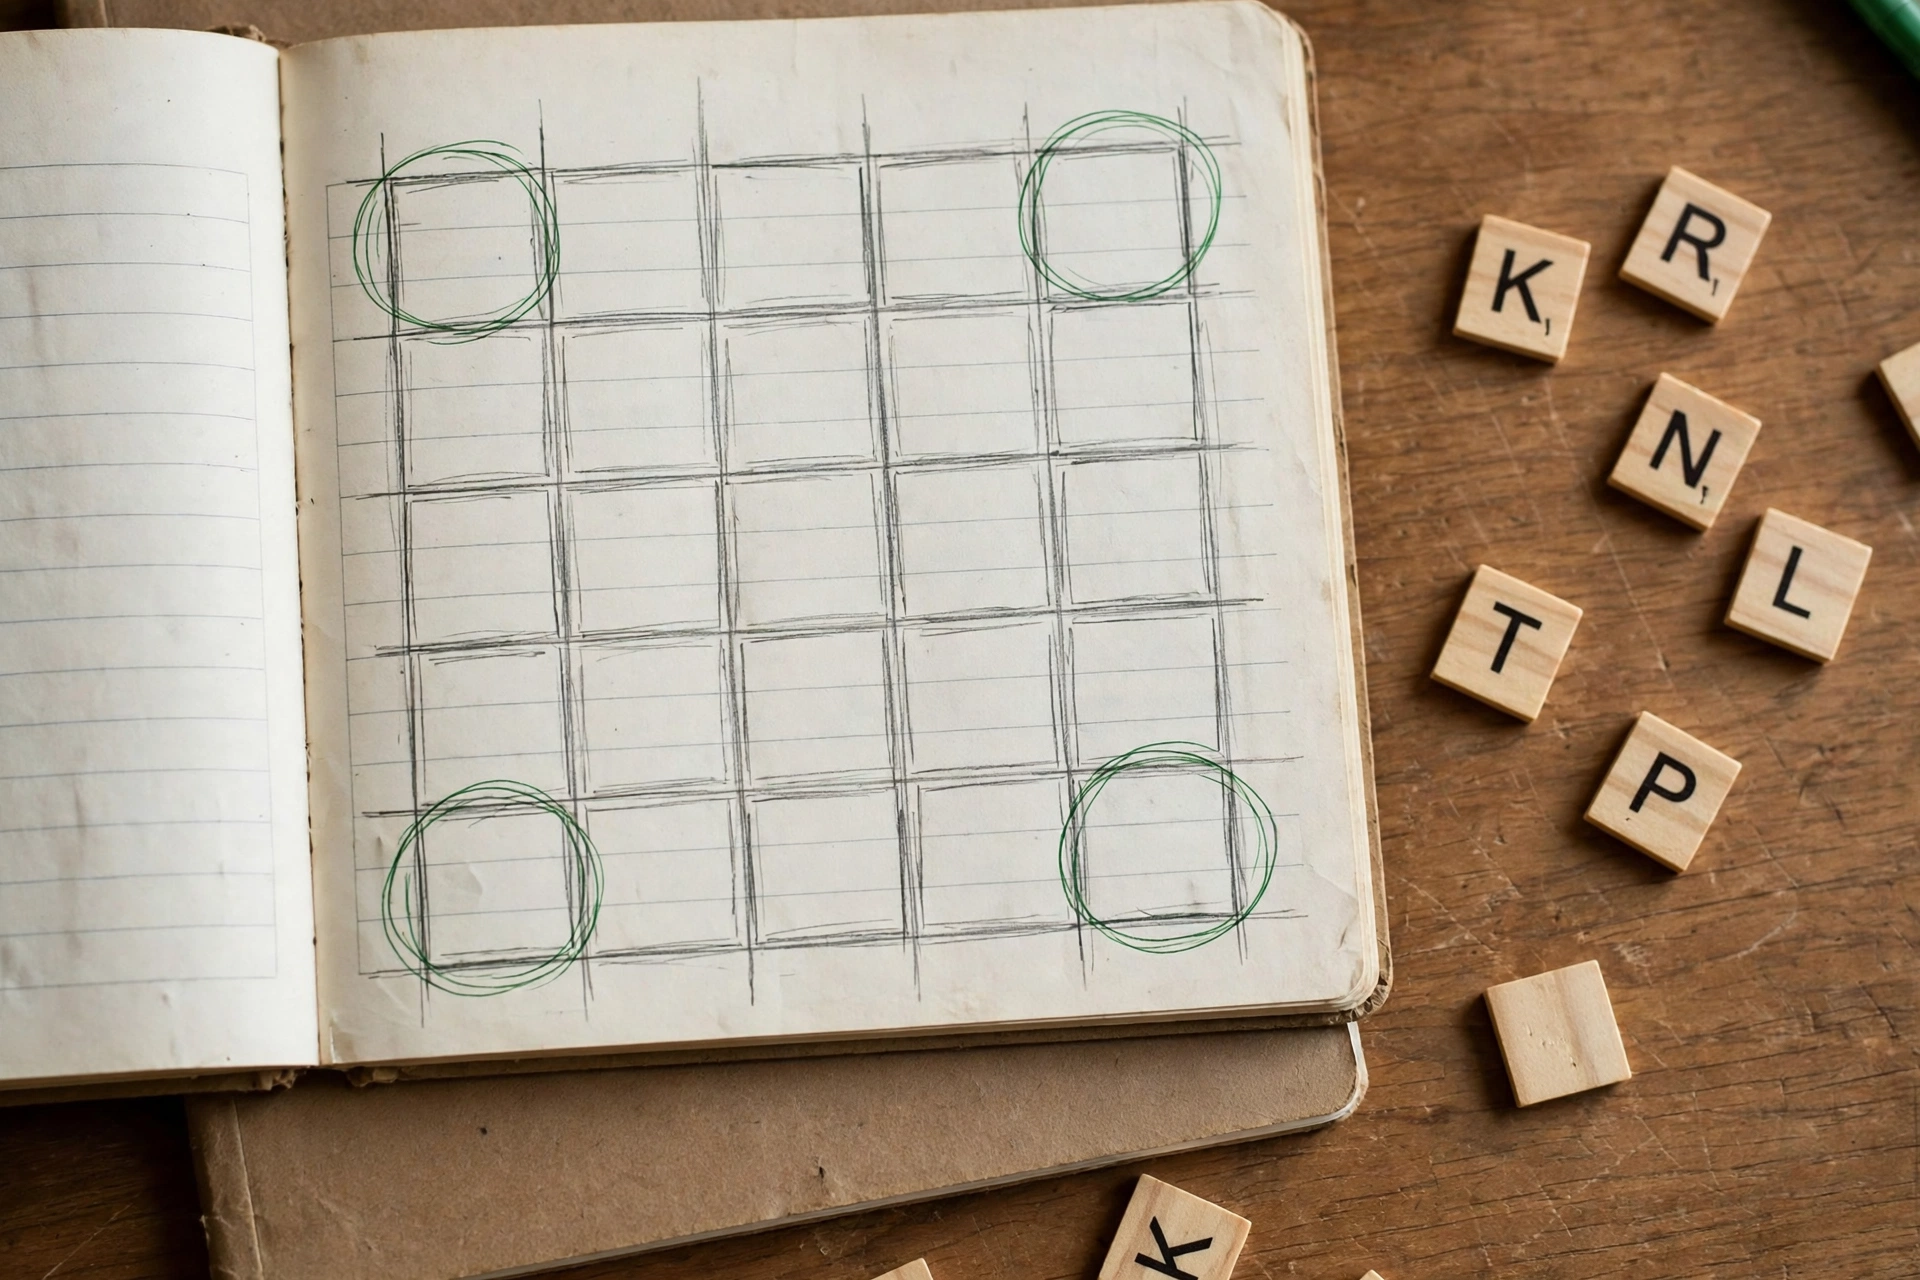
A standard Waffle board on this site holds 19 letter tiles in a 5 by 5 grid, forming five words: three across and two down. You have 15 swaps to solve it. Every swap moves two letters, so a careless swap can fix one letter while breaking another. The whole game is about getting the most value from each of your 15 swaps, and the corners are where that value lives.
Only six of the 19 tiles belong to two words at once. Four of them are the corners. The other two are the left and right tiles of the middle row, where the middle across word crosses the two down words. The remaining 13 tiles belong to one word each. That split is the whole argument for corners first. A correct corner does double work. A correct middle tile does single work. When swaps are limited, double work wins.
Think of it as information per move. Suppose the top left corner turns green. You now know the first letter of the top row and the first letter of the left column. Two words have a known letter, and you have spent zero swaps, because the tile started green. Suppose instead that the second tile of the top row turns green. You know one letter of one word. Same colour, same lock, half the information. The SolveWordGames strategy guide makes the same point in its section on corner and centre priority: each corner tile forms both the start or end of an across word and a down word, and locking the four corners fixes the boundaries of all four outer words. Its FAQ answers the question directly: locking an intersection tile green gives two-dimensional constraints that narrow the letters for two words at once.
There is a second reason corners matter, and it is about guessing words. A word with a known first letter is far easier to guess than a word with a known middle letter. If the top row starts with P and ends with T, and the row holds an A and an N somewhere, the word is probably PLANT, and you can test that guess in one swap. If you only know the middle letter is A, the word could be dozens of things. Corners give you the edges of words, and edges are what make a word guessable. That is why experienced players read the corners before they read anything else.
The third reason is about mistakes. A swap that moves a corner tile changes two words at once. If you swap a corner tile without thinking about both of its words, you can fix the row and break the column in a single move. Reading the corners first protects you from that. Once you know what each corner should be, you will never move a corner tile by accident, and you will never plan a swap that ignores the down word running through it.
The Board Map: Corners, Centre, and Edges
Before your first swap, take thirty seconds to map the board. Every tile falls into one of three groups, and each group deserves a different amount of your attention.
| Tile position | Words it belongs to | What it tells you |
|---|---|---|
| Top left corner | Top row and left column | The first letter of two words |
| Top right corner | Top row and right column | The last letter of one word, the first letter of another |
| Bottom left corner | Bottom row and left column | The first letter of one word, the last letter of another |
| Bottom right corner | Bottom row and right column | The last letter of two words |
| Middle row, left edge | Middle row and left column | The middle letter of two words |
| Middle row, right edge | Middle row and right column | The middle letter of two words |
| Centre tile | Middle row only | The middle letter of one word |
| Every other tile | One word only | One letter of one word |
Read the table from the top. The four corners and the two middle-row edges are the six crossing tiles. They are the only tiles that do double work. Everything else belongs to a single word.
The centre tile deserves a special note, because most strategy guides describe it differently. On the original Waffle board, which has six words (three across and three down), the centre tile is a crossing: it joins the middle row and the middle column. The SolveWordGames guide describes it that way, and on the original board that description is correct. On this site’s standard board, there is no down word through the centre column. The board has three across words and two down words, so the centre tile belongs to the middle row only. It is a single-word tile, just like the second tile of the top row. If you read a guide written for the original game, translate its centre advice to this site’s middle-row edge tiles instead. They are the crossings that matter here, along with the four corners.
Here is the thirty-second routine. First, read the four corners and say what each one tells you. A green corner is a fact about two words. A yellow corner is a letter that belongs in one of its two words, in a different spot. A grey corner belongs in neither word, which is also useful information. Second, read the two middle-row edge tiles the same way. Third, read the centre tile and note the middle letter of the middle row. Fourth, glance at the rest. By the time you finish, you will know which words are closest to solved and which corners need fixing first. Only then should you make a swap.
The Worked Example: A Teaching Board Solved in 13 Swaps
This section works through one complete board, swap by swap, so you can see the corners first method in action. The board below is a teaching example built for this guide. Its five words are PLANT, INDEX, and ETHIC across, and PRICE and TOXIC down. It is not a daily puzzle, and it is not today’s answers. This site has no shared daily puzzle, so no board in any guide can ever be today’s answers. The words were chosen because their crossing letters are easy to check: PLANT and PRICE share P, PLANT and TOXIC share T, INDEX and PRICE share I, INDEX and TOXIC share X, ETHIC and PRICE share E, and ETHIC and TOXIC share C.
Here is the starting board. Dots mark the empty squares of the grid, where no tile sits.
| P | N | T | L | O |
| I | . | . | . | R |
| E | A | I | X | N |
| H | . | . | . | T |
| C | E | D | I | C |
The colours on this starting board are three green, twelve yellow, and four grey. The green tiles are the P in the top left corner, the I in the middle of the bottom row, and the C in the bottom right corner. The grey tiles are the R in the right column, the A in the middle row, the H in the left column, and the D in the bottom row. Every other tile is yellow.
Start with the corner read, before any swap. The top left P is green, so the top row starts with P and the left column starts with P. The top right O is yellow, and the top row has no O, so the O belongs in the right column, which spells TOXIC. The bottom left C is yellow, and C appears in both the bottom row (ETHIC ends with C) and the left column (PRICE has C fourth), so the C belongs at the end of the bottom row or fourth in the left column. The bottom right C is green, so the bottom row ends with C and the right column ends with C. Two corners are already solved, two need work, and you know all of that before spending a single swap.
The top row also gives you a gift: the N in the second spot and the L in the fourth spot belong to each other. The row needs L second and N fourth, and those two letters are sitting in each other’s places. That is a two-for-one swap, the most valuable move in Waffle, and the corner read is what finds it, because you were looking at the top row to check its corners.
Swap 1: trade the N at the top row, second spot, with the L at the top row, fourth spot. Both tiles turn green. The top row now reads P L T N O, with only the middle letter and the last letter still wrong. Swaps used: 1.
Swap 2: trade the T in the top row middle with the O in the top right corner. The T lands in the top right corner and turns green, so the top row now ends with T. The O moves to the middle of the top row, where it does not belong, but that is fine, because the O belongs in the right column and the next swaps will carry it there. Swaps used: 2.
Swap 3: trade the O in the top row middle with the R in the right column, second spot. The O lands in the right column and turns green. The R moves to the middle of the top row. The R belongs at the top of the left column, second spot, so it is one swap away from home. Swaps used: 3.
Swap 4: trade the R in the top row middle with the I in the left column, second spot. The R lands in the left column and turns green. The I moves to the middle of the top row. The I belongs at the start of the middle row. Swaps used: 4.
Swap 5: trade the I in the top row middle with the E at the start of the middle row. The I lands at the start of the middle row and turns green. The E moves to the middle of the top row. The E belongs fourth in the middle row. Swaps used: 5.
Swap 6: trade the E in the top row middle with the X fourth in the middle row. The E lands fourth in the middle row and turns green. The X moves to the middle of the top row. The X belongs at the end of the middle row. Swaps used: 6.
Swap 7: trade the X in the top row middle with the N at the end of the middle row. The X lands at the end of the middle row and turns green. The N moves to the middle of the top row. The N belongs second in the middle row. Swaps used: 7.
Swap 8: trade the N in the top row middle with the A second in the middle row. Both tiles turn green. The A lands in the middle of the top row, and the N lands second in the middle row. The top row now reads PLANT, complete. The middle row reads I N I E X, with only the centre tile still wrong. Swaps used: 8.
Notice what happened in swaps 3 through 8. Each swap put one letter into its correct spot, and the letter it displaced became the next letter to place. That is called a chain, and it is the most efficient way to work through a scrambled board. The chain works because every letter on the board already belongs somewhere, so placing one letter always reveals the next one. The corner read started the chain: fixing the top right corner in swap 2 put the O in play, and the O led to the R, which led to the I, and so on through the whole middle row. If you had started in the middle instead, you would have found the same letters eventually, but you would have spent extra swaps getting there.
The centre tile is next. It sits in the middle of the middle row, currently showing I, and it needs to be D. The D is in the bottom row, third spot, and getting it home means working through the bottom row and the left column, which is where the remaining letters live.
Swap 9: trade the I in the centre with the T in the right column, fourth spot. The I lands in the right column and turns green. The T moves to the centre. The T belongs second in the bottom row. Swaps used: 9.
Swap 10: trade the T in the centre with the E second in the bottom row. The T lands second in the bottom row and turns green. The E moves to the centre. The E belongs at the start of the bottom row. Swaps used: 10.
Swap 11: trade the E in the centre with the C in the bottom left corner. The E lands in the bottom left corner and turns green, so the bottom row now starts with E and the left column now ends with E. The C moves to the centre. The C belongs fourth in the left column. Swaps used: 11.
Swap 12: trade the C in the centre with the H in the left column, fourth spot. The C lands in the left column and turns green. The H moves to the centre. The H belongs third in the bottom row. Swaps used: 12.
Swap 13: trade the H in the centre with the D third in the bottom row. Both tiles turn green. The D lands in the centre, and the H lands third in the bottom row. The middle row now reads INDEX, complete. The bottom row now reads ETHIC, complete. The left column reads PRICE, complete. The right column reads TOXIC, complete. Swaps used: 13.
Here is the finished board.
| P | L | A | N | T |
| R | . | . | . | O |
| I | N | D | E | X |
| C | . | . | . | I |
| E | T | H | I | C |
Thirteen swaps, with two left over from the 15-swap budget. Three of the thirteen swaps turned two tiles green at once (swaps 1, 8, and 13). The other ten turned one tile green each. Count the greens to check the arithmetic: the board started with 3 green tiles, the thirteen swaps added 16 new greens (three swaps adding two each, ten swaps adding one each), and 3 plus 16 is 19, which is every tile on the board.
Thirteen is three more than the 10-swap par on the original game, and that is worth understanding rather than worrying about. The board started with only three green tiles, which is a low number, so there was more work to do than on a board that starts with five or six greens. The corner-first method still kept every swap productive: no swap in this solve turned zero tiles green, and no swap ever moved a tile that was already green. That is the standard to judge yourself by. A solve with zero wasted swaps is a good solve at any count, and a solve that wastes three swaps on random moves will run out of moves even on an easy board.
When a Corner Is Already Green
A green corner is the best news a board can give you, and the correct response is to leave it alone and use it. A green tile is locked in place, so you cannot move it even if you try, and you should not want to. It is a confirmed letter in two words, and your job is to build around it.
Start by writing down, in your head or on paper, the two facts the corner gives you. A green B in the top left corner means the top row starts with B and the left column starts with B. That is often enough to guess one of the two words. If the top row also holds a yellow A and a yellow T, the word is probably BAT something, or BEAT, or BOAT, and you can test the most likely option with a single swap. If the left column holds a yellow E and a yellow R, the word probably starts with B and ends with ER, which narrows it to a small set of words. Two green corners give you four facts, which is usually enough to guess two or three of the five words before your first swap.
When all four corners are green, the puzzle is much closer to solved than it looks. You know the first and last letters of the top and bottom rows, and the first and last letters of the two columns. That leaves only the middle letters to find, and the middle letters are the easiest part, because the vowels usually sit there. Do not rush in that situation. Read the four corner words, guess each one, and plan your swaps so that each one turns two tiles green. A board with four green corners can often be finished in six or seven swaps, which is well under par.
One warning: a green corner does not mean its words are solved. It means one letter in each word is correct. Four other letters in each word still need to be right. New players sometimes see a green corner and stop thinking about that word, then wonder why the row never turns fully green. Keep solving until all five tiles in the row are green, and check the column too. The corner is a start, not a finish.
Our guide to are green tiles locked in Waffle explains the lock in full, including why it exists and how locked tiles change your planning. The short version is that green means done, and done means you build outward from it, never through it.
When a Corner Is Grey
A grey corner looks like bad news, and it is not. A grey tile means the letter does not belong in either of the two words that meet at that corner. That rules the letter out of two words at once, which is twice as much information as a grey tile in the middle of a row gives you. Treat a grey corner as a clue, not a problem.
The practical rule is simple: the letter in a grey corner has to leave both words. Do not try to move it to another spot in the same row, because it does not belong in that row at all. Do not try to move it to another spot in the same column either, for the same reason. A grey corner tile cannot belong in either crossing word, so its home is in one of the other three words on the board. Find which word needs that letter, and swap the corner tile there.
Here is an example. Suppose the top right corner shows a grey M. The top row does not contain M, and the right column does not contain M. But the middle row might need an M, or the bottom row might. Look at the yellow tiles in the other words. If the middle row has a yellow tile in the spot where an M would fit, that is your target. Swap the grey M into that spot, and the letter it displaces goes to the corner, where it may turn yellow or green. One swap, and the corner is no longer grey.
The mistake to avoid is the opposite move: swapping a grey corner tile with another tile in the same row. That keeps the wrong letter in the wrong word, and it costs a swap to learn nothing. Before you move any corner tile, ask which word it belongs in. If the answer is neither of its two words, move it out of both. The wafflegame.org FAQ gives the same advice in its colour table: a grey tile means the letter is not part of that specific word, so check the word it crosses, because the letter may belong there instead. On a corner, check both words, then look elsewhere.
Grey corners also help you guess words by elimination. If the top left corner is a grey S, the top row and the left column both exclude S. That rules out every word starting with S, which is a large group of five-letter words. Combined with the letters you do have, that elimination often leaves only one sensible word for the row. Elimination is slower than a green clue, but it is just as real, and players who use it solve faster than players who ignore grey tiles.
The Centre Tile’s Role
The centre tile is the most misunderstood tile on this site’s board, because most guides describe the original game, where the centre is a crossing. On this site’s standard board, it is not. The centre tile sits in the middle of the middle row, and it belongs to that row only. There is no down word through the centre column. Saying it plainly matters, because a player who treats the centre as a crossing will plan swaps that make no sense, moving letters into the centre column as if a word ran down it.
That said, the centre tile still matters, for three reasons. First, it is the middle letter of the middle word, and the middle letter of a five-letter word is very often a vowel. If the centre is an A, E, I, O, or U, the middle word probably has that vowel in the middle, which is one of the most common patterns in English. If the centre is a consonant, the word probably has its vowels elsewhere, which tells you something too. Second, the centre tile is the last tile in the teaching board’s solve, and that is typical: the centre is often the final piece, because it can only be fixed by a swap with a tile that belongs in the middle row, and those swaps come late in the solve. Third, a green centre tile anchors the middle word the same way any green tile anchors its word. It is one confirmed letter, and the word can be guessed around it.
The practical order is: corners first, then the two middle-row edge tiles, then the centre, then the rest. Do not start with the centre. Do not finish with the corners. The centre is a useful clue, not a priority. On the Deluxe board, the rule changes, because the Deluxe board has three down words, and the centre column carries one of them. That makes the centre a crossing on Deluxe, and it moves up the priority list. The Deluxe section below covers that in detail.
One more detail about the centre. Some guides, including the SolveWordGames guide, say the centre tile connects the middle horizontal and middle vertical words. That is true on the original six-word board, and it is one of the reasons the original board plays differently from this site’s board. If you are reading strategy advice written for the original game, check which board it assumes before you follow it. On this site, the five-word board has six crossings, not nine, and the centre is not one of them. Our beginner’s guide shows the board layout for this site, so you can see the difference for yourself.
Common Mistakes That Waste Swaps
Most lost swaps come from a small set of repeated mistakes. Here are the six that cost the most, with the fix for each one.
Chasing yellows in the middle first. A yellow tile in the middle of a row tells you the letter belongs in that word, but not where. Players see a yellow letter, guess a spot for it, and swap it there, only to watch it turn grey. The fix is to place yellow letters last. Read the corners first, guess the words, and let the word shapes tell you where the yellow letters go. A yellow letter with a known word around it has only one or two possible spots. A yellow letter on its own has four.
Wasting swaps on identical letters. If a board holds two tiles with the same letter, swapping them changes nothing. The board looks exactly the same, and you have spent a swap. This happens most often with common letters like E, A, and T, and it happens most often at crossings, where two copies of the same letter sit in different words. Before any swap, check whether the two tiles hold the same letter. If they do, stop. Our guide to how many swaps you get in Waffle explains the 15-swap budget, and a swap spent on identical letters is the easiest one to avoid.
Ignoring the down words. The board has two down words, and they are half the puzzle. Players who think in rows only will solve the three across words and then find the columns are a mess, with letters that belong in the rows sitting in the columns. The fix is the corner read. Every corner belongs to a down word, so reading the corners forces you to think about the columns from the start. If a swap fixes a row letter but breaks a column letter, it is a bad swap, and the corner read is what shows you that before you make it.
Moving a yellow corner into the wrong word. A yellow corner tile belongs in one of its two words, but not necessarily the one you are looking at. Suppose the top right corner is yellow, and you assume it belongs in the top row, so you slide it along the row. It turns grey, because it actually belonged in the right column. You have spent a swap and learned something you could have worked out for free: check both words before moving a yellow corner. If the row already has that letter somewhere else, the corner tile belongs in the column. If the column already has it, the tile belongs in the row.
Planning a swap through a green tile. Green tiles are locked, so a swap that uses one simply does not happen. The game ignores it, and no swap is spent, which is good. But the time you spent planning that swap is wasted, and worse, the plan you built around it falls apart. After every swap, update your mental map. New green tiles are new locks, and your next plan must work around them.
Solving one word and breaking another. This is the crossing trap, and it is the most expensive mistake on the board. You swap a tile into the middle row to complete a word, and the tile you displaced was the correct letter for the column it came from. Now the column is broken, and you need another swap to fix it. The fix is to check both directions before every swap. A tile at a crossing affects two words. A tile in the middle of a row affects one. The more words a swap touches, the more carefully you should check it.
Corners First in Deluxe
Deluxe changes the board, but it does not change the rule. The Deluxe board on this site is 5 by 6, with six words (three across and three down), 25 swaps, and 4 hints. The extra down word runs through the centre column, so the board has nine crossing tiles instead of six: the four corners, the two middle-row edges, the centre tile, and the top and bottom tiles of the centre column. Every one of those nine tiles does double work, and the corners still come first.
The reason the corners still come first is the same as on the standard board: they fix the boundaries of words. On Deluxe, a green top left corner still tells you the first letter of the top row and the first letter of the left column. A green bottom right corner still tells you the last letter of two words. The difference is that there are more crossings competing for your attention, so the order matters even more. Read the four corners, then the centre tile (which is a crossing on Deluxe), then the other four crossings, then the rest.
The 25-swap budget gives you more room than the standard 15, but the same discipline saves swaps. A Deluxe board solved with corners first will often finish with five or six swaps to spare. A Deluxe board solved from the middle will often run to 22 or 23 swaps, close enough to the limit that one mistake ends the puzzle. The extra words make the board harder, not easier, and the corner habit is what keeps it under control.
One practical difference: on Deluxe, use your hints differently. On the standard board, a hint is best spent when one word will not settle. On Deluxe, spend a hint on a corner that will not resolve, because a stuck corner blocks two words, not one. Our Deluxe guide covers the mode in full, including the hint system and the 25-swap budget.
Practice Drills: Train the Corner-First Habit
Knowing the rule is not the same as using it. The habit has to be trained, and the best place to train it is Unlimited mode, where a fresh board is one tap away at any time. There is no reset wait on this site, so you can play as many practice boards as you like. Here are five drills, in the order to try them.
Drill 1: the thirty-second corner read. Open a fresh Unlimited board and do nothing for thirty seconds except read the corners. Say out loud what each corner tells you: green, yellow, or grey, and which words it affects. Then guess the five words before making a single swap. Do this for five boards in a row. You are training your eyes to go to the corners first, and after five boards it will start to feel automatic.
Drill 2: the two-for-one hunt. Open a board and find one swap that turns two tiles green at once, before you make any other move. Do not swap until you have found one. Corners are the best place to look, because a corner swap often fixes two words, and a pair of tiles in the same row that belong in each other’s spots is the classic pattern. The teaching board’s first swap is an example: N and L trading places in the top row.
Drill 3: the grey corner drill. When a board has a grey corner, stop and work out where that letter belongs before you move anything else. Write down the three words it could belong to, cross out the two it cannot belong to, and swap it into the one that is left. This drill teaches elimination, which is the skill most players never practise.
Drill 4: the chain drill. Pick one letter on the board and follow it home through as many swaps as it takes, like the teaching board’s chain through the middle of the top row. The rule is that each swap must turn at least one tile green. If a swap in your chain turns nothing green, stop and replan. This drill teaches the habit of planning a sequence instead of making one swap at a time.
Drill 5: the Deluxe corner drill. Play a Deluxe board and read all nine crossings before your first swap: four corners, the centre, and the four other crossing tiles. Write down what each one tells you. Deluxe is where the corner habit pays the most, because nine crossings carry far more information than six, and a player who reads them all starts the puzzle with a map of the whole board.
Do one drill a day for a week, and the corner-first habit will stick. After that, you will not need to think about it. Your eyes will go to the corners on their own, and your swap counts will drop without any extra effort. That is the point of practice: to make the good habit the automatic one.

Corners First and the 5-Star Goal
On the original Waffle game, solving in fewer swaps earns stars. The maths is simple: you get 15 swaps, every puzzle can be solved in 10, and each unused swap earns a star, so a 10-swap solve earns 5 stars and a 15-swap solve earns none. The wafflegame.org FAQ states the same figures, and the dailywafflegame.com guide to getting 5 stars builds its whole method around them: plan the grid first, look for swaps that turn two letters green, and never make a swap that turns nothing green. Those figures belong to the original game, and this site has no star-award logic, so treat the swap count as your own score instead. The goal is the same either way: finish with swaps to spare.
Corners first is the most reliable way to get there, because it attacks the swap count from both ends. It reduces the number of swaps you need, by fixing two words with one move, and it reduces the number of swaps you waste, by stopping you from moving letters that are already correct. The teaching board shows both effects. The thirteen swaps included three double-green swaps, which saved three swaps against fixing one tile at a time. Without them, the same board would have taken sixteen swaps, which is more than the budget allows. And no swap in the solve was wasted on a green tile or an identical-letter pair, which is the other half of the discipline.
If you want a target to aim at, try this: solve a standard board in 12 swaps or fewer. That is two over the original game’s par, and it is a realistic goal for a player who reads the corners first and plans in chains. When 12 becomes comfortable, aim for 11, then 10. Do not chase 10 from the start. A player who aims for par on every board will start guessing, and guessing wastes more swaps than careful play ever does. Our guide to how to get 5 stars in Waffle explains the star maths and the swap-saving habits in full, and it is the natural next read after this one. You can also play a fresh board right now on thewafflegame.uk and test the corner-first method on it.
Frequently Asked Questions
Why should I solve the corners first in Waffle?
Each corner tile belongs to two words at once, one across and one down, so fixing a corner gives you information about two words for the price of one move. Corners also fix the first and last letters of words, which makes the words much easier to guess than a known middle letter does.
Do the corners always come first, even when the middle looks easier?
Almost always. Read the corners first even when a middle word looks close to solved, because the corner read takes thirty seconds and it tells you whether that middle word is really as close as it looks. The only exception is a board where all four corners are already green, in which case you move on to the middle-row edges and the centre.
What should I do if a corner tile is grey?
A grey corner means the letter belongs in neither of its two words, so move it out of both. Find which of the other three words needs that letter and swap it there. Do not slide it along its row or column, because it does not belong in either word.
What should I do if a corner is already green?
Leave it alone and use it. A green corner is a confirmed letter in two words, so write down the two facts it gives you and guess the words around it. A green tile is locked and cannot be moved, and it is the strongest clue on the board.
Does the corners first strategy work in Deluxe Waffle?
Yes, and it matters even more. The Deluxe board is 5 by 6 with six words and 25 swaps, and it has nine crossing tiles instead of six, because the centre column carries a down word. Read the four corners first, then the centre tile, then the other crossings.
What about the centre tile? Is it as important as a corner?
On this site’s standard board, no. The centre tile belongs to the middle row only, because there is no down word through the centre column, so it does single work while a corner does double work. Read the corners and the middle-row edges first, then the centre. On the original six-word board and on Deluxe, the centre is a crossing, so it ranks higher there.
How many swaps can corners first save?
It depends on the board, but the teaching example in this guide shows the scale: three of its thirteen swaps turned two tiles green at once, saving three swaps against fixing one tile at a time. Without those double-green swaps, the same board would have needed sixteen swaps, which is more than the fifteen-swap budget. The saving comes from double-green swaps and from never wasting a swap on a locked tile or an identical-letter pair.
Conclusion
Solve the corners first. That is the whole strategy in five words, and it works because the board rewards it: corner tiles belong to two words, so every correct corner does double work, and every swap you spend on a corner pays you back twice. Read the four corners before your first swap, then the two middle-row edges, then the centre, then the rest. Guess the words from their edges, plan swaps that turn two tiles green at once, and check both directions before you move a crossing tile.
The teaching board in this guide took thirteen swaps, and every one of them turned at least one tile green. That is the standard to hold yourself to, not the swap count itself. A thirteen-swap solve with zero wasted moves beats a ten-swap solve that got lucky. Practise the corner read in Unlimited mode, run the five drills for a week, and the habit will become automatic. Then try it on Deluxe, where nine crossings give you even more to work with. Open a fresh board on thewafflegame.uk and start with the corners. Your swap count will show you the difference within a few games.